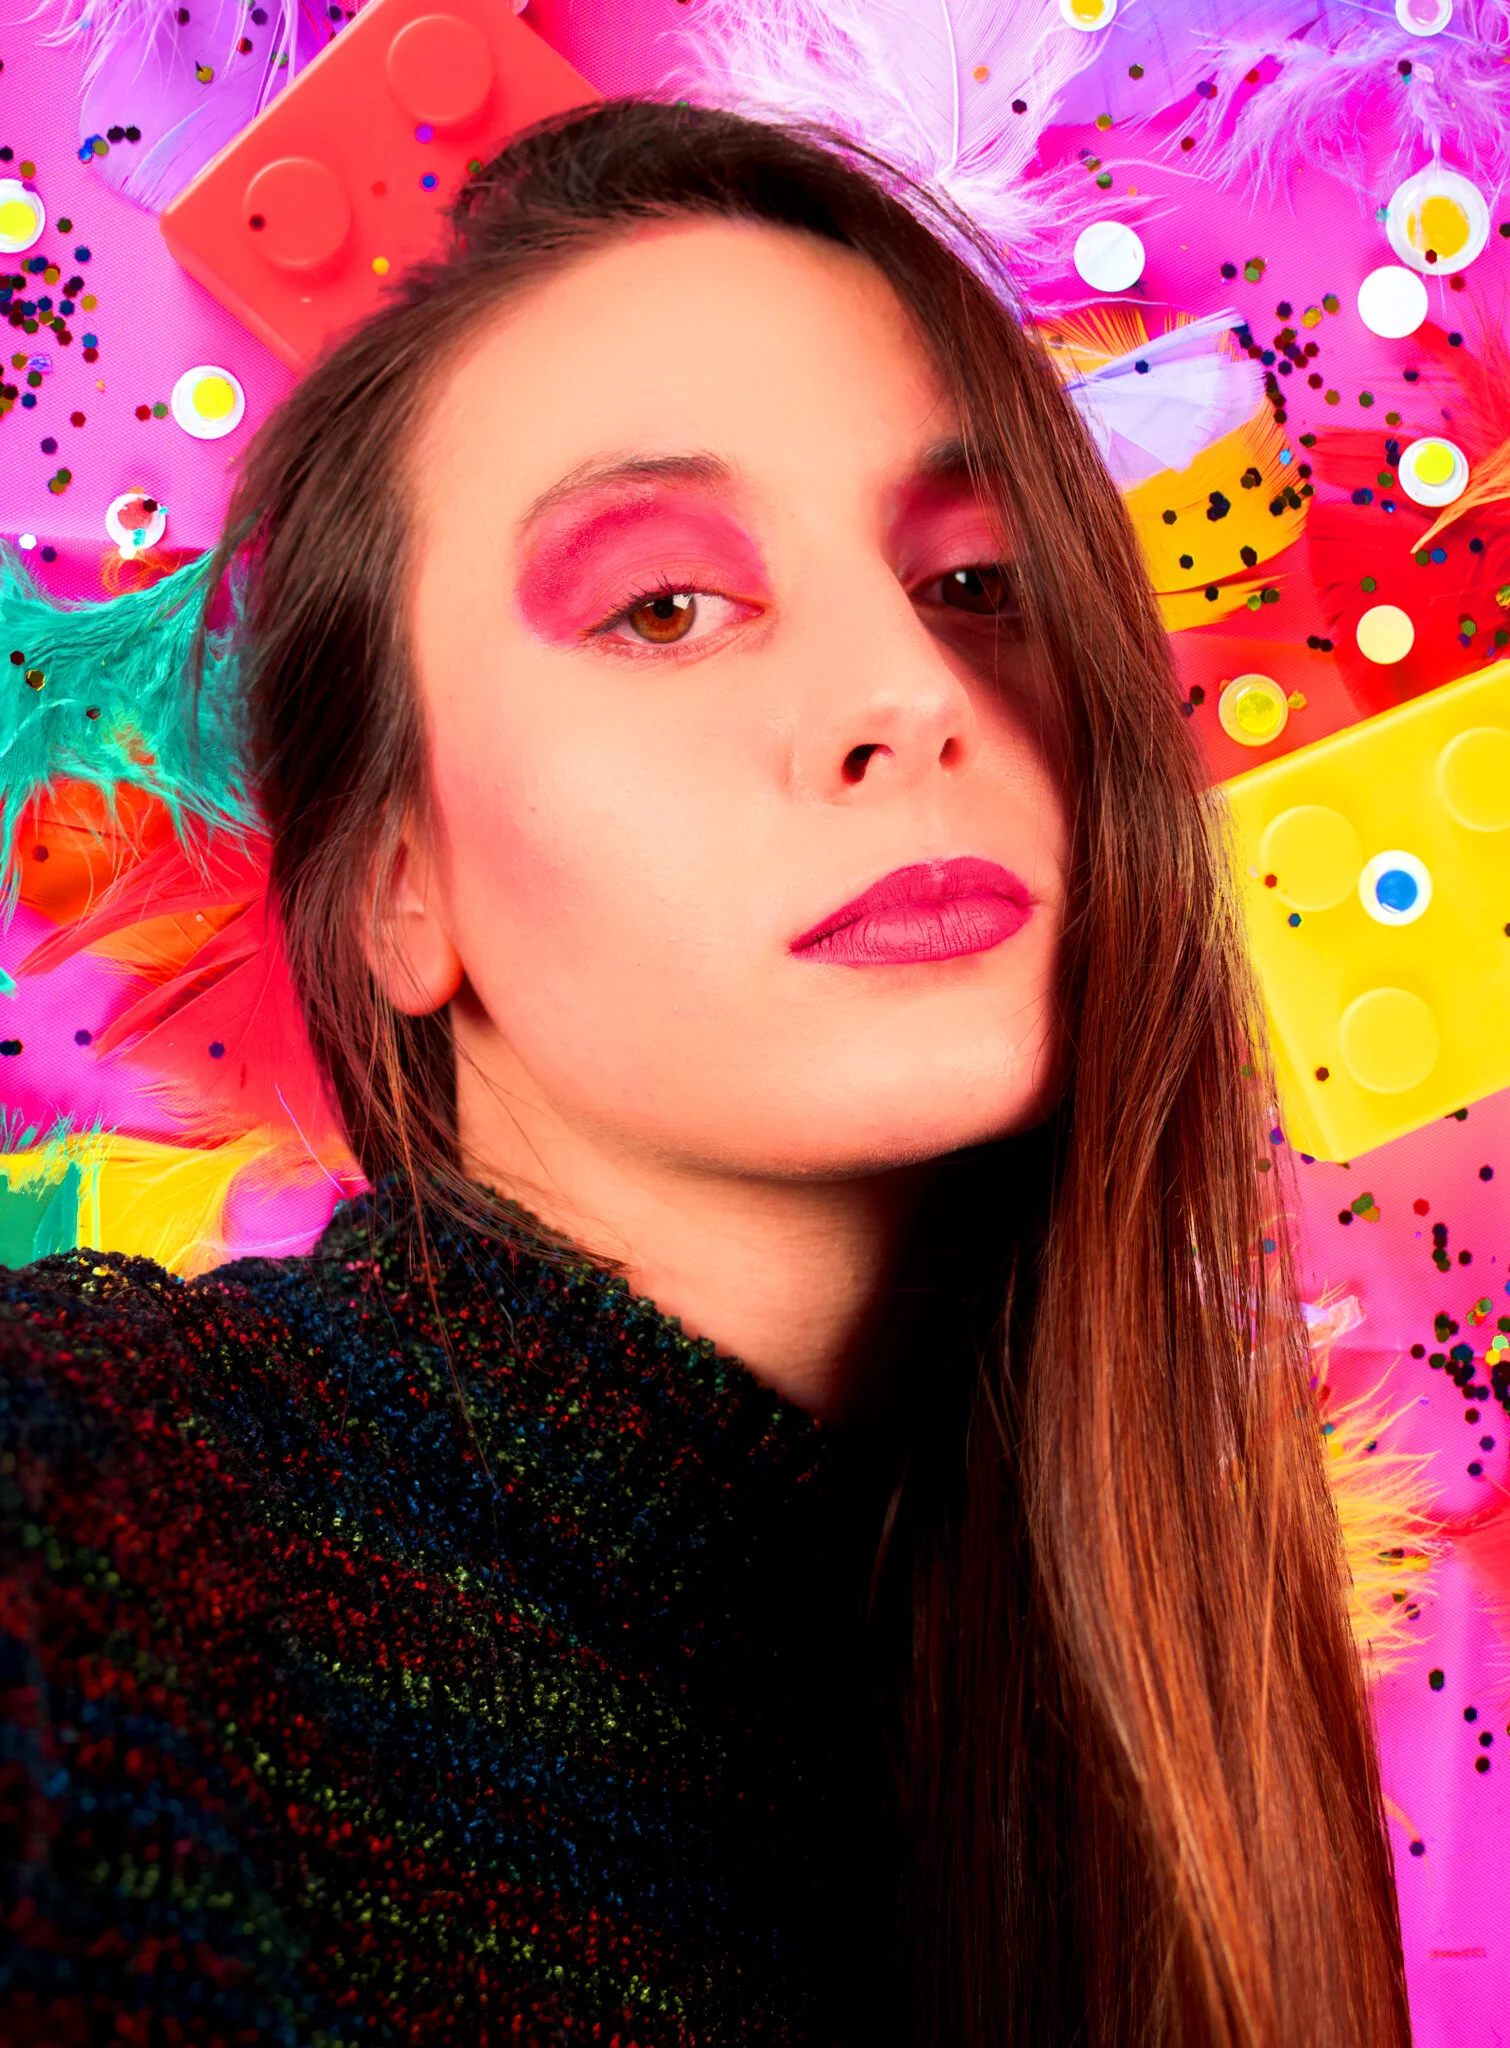
'80s Ambience
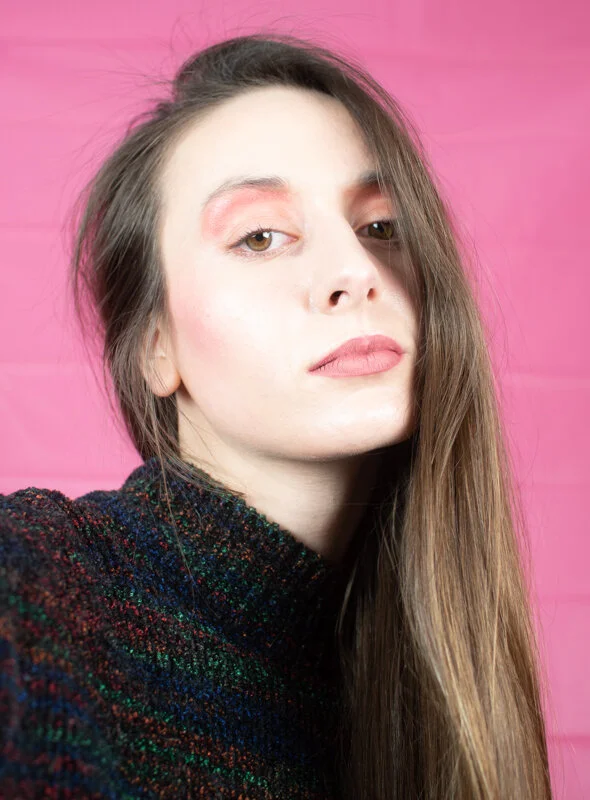
Hello there! This is Kaila Hicks of Lively Lens Photography and this is week one of Trusting the Process. This blog will give you a glimpse of what I can create in my basement studio, photographing still-life scenes, self-portraits, etc. Utilizing the resources that I have, I will be doing a weekly photography session over the next couple of months and show you behind the scenes of my creative process. This first session is called ‘80s Ambience, a vibrant and colorful self-portrait that I created on a whim, let’s take a look!
The Set-Up
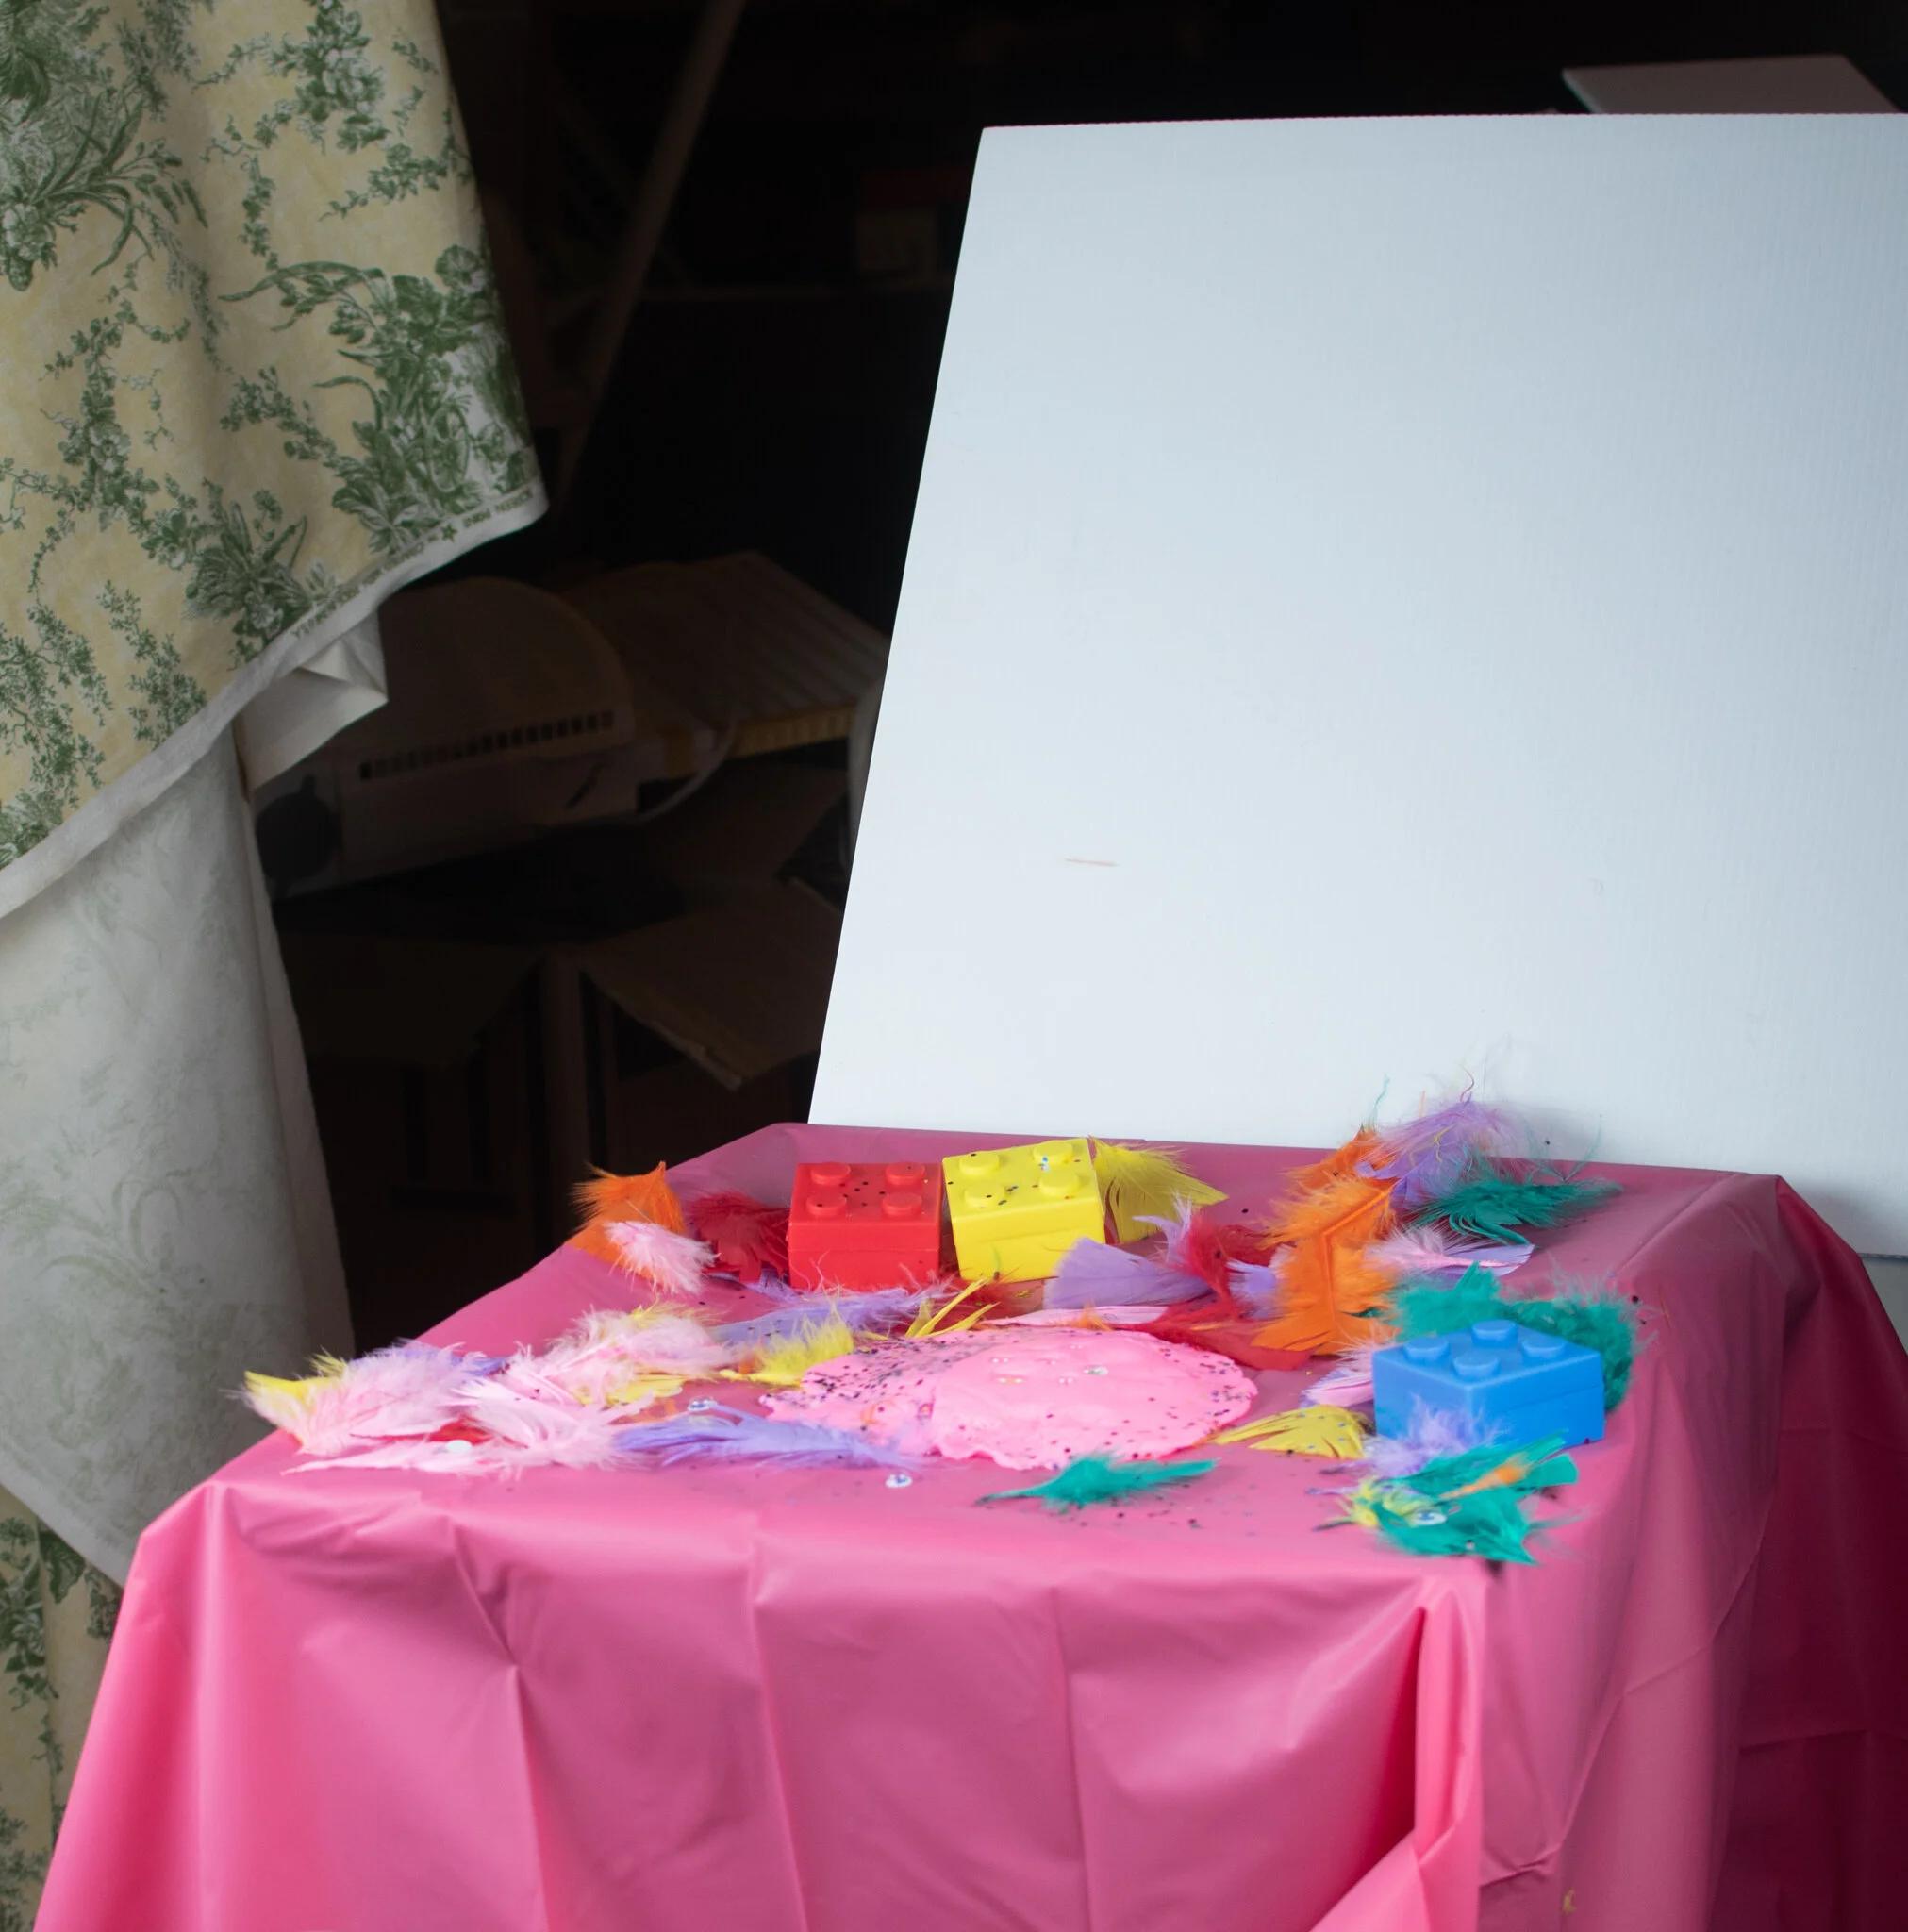
This is the set-up for the background photo of my self-portrait. The table items were toys and little knick knacks that I got from the dollar store for less than $20. They are on a table I found in my basement covered with a pink shower protector that I also got from the dollar store. I used a foam board as a light reflector to bring out the shadows as you can see in the picture.
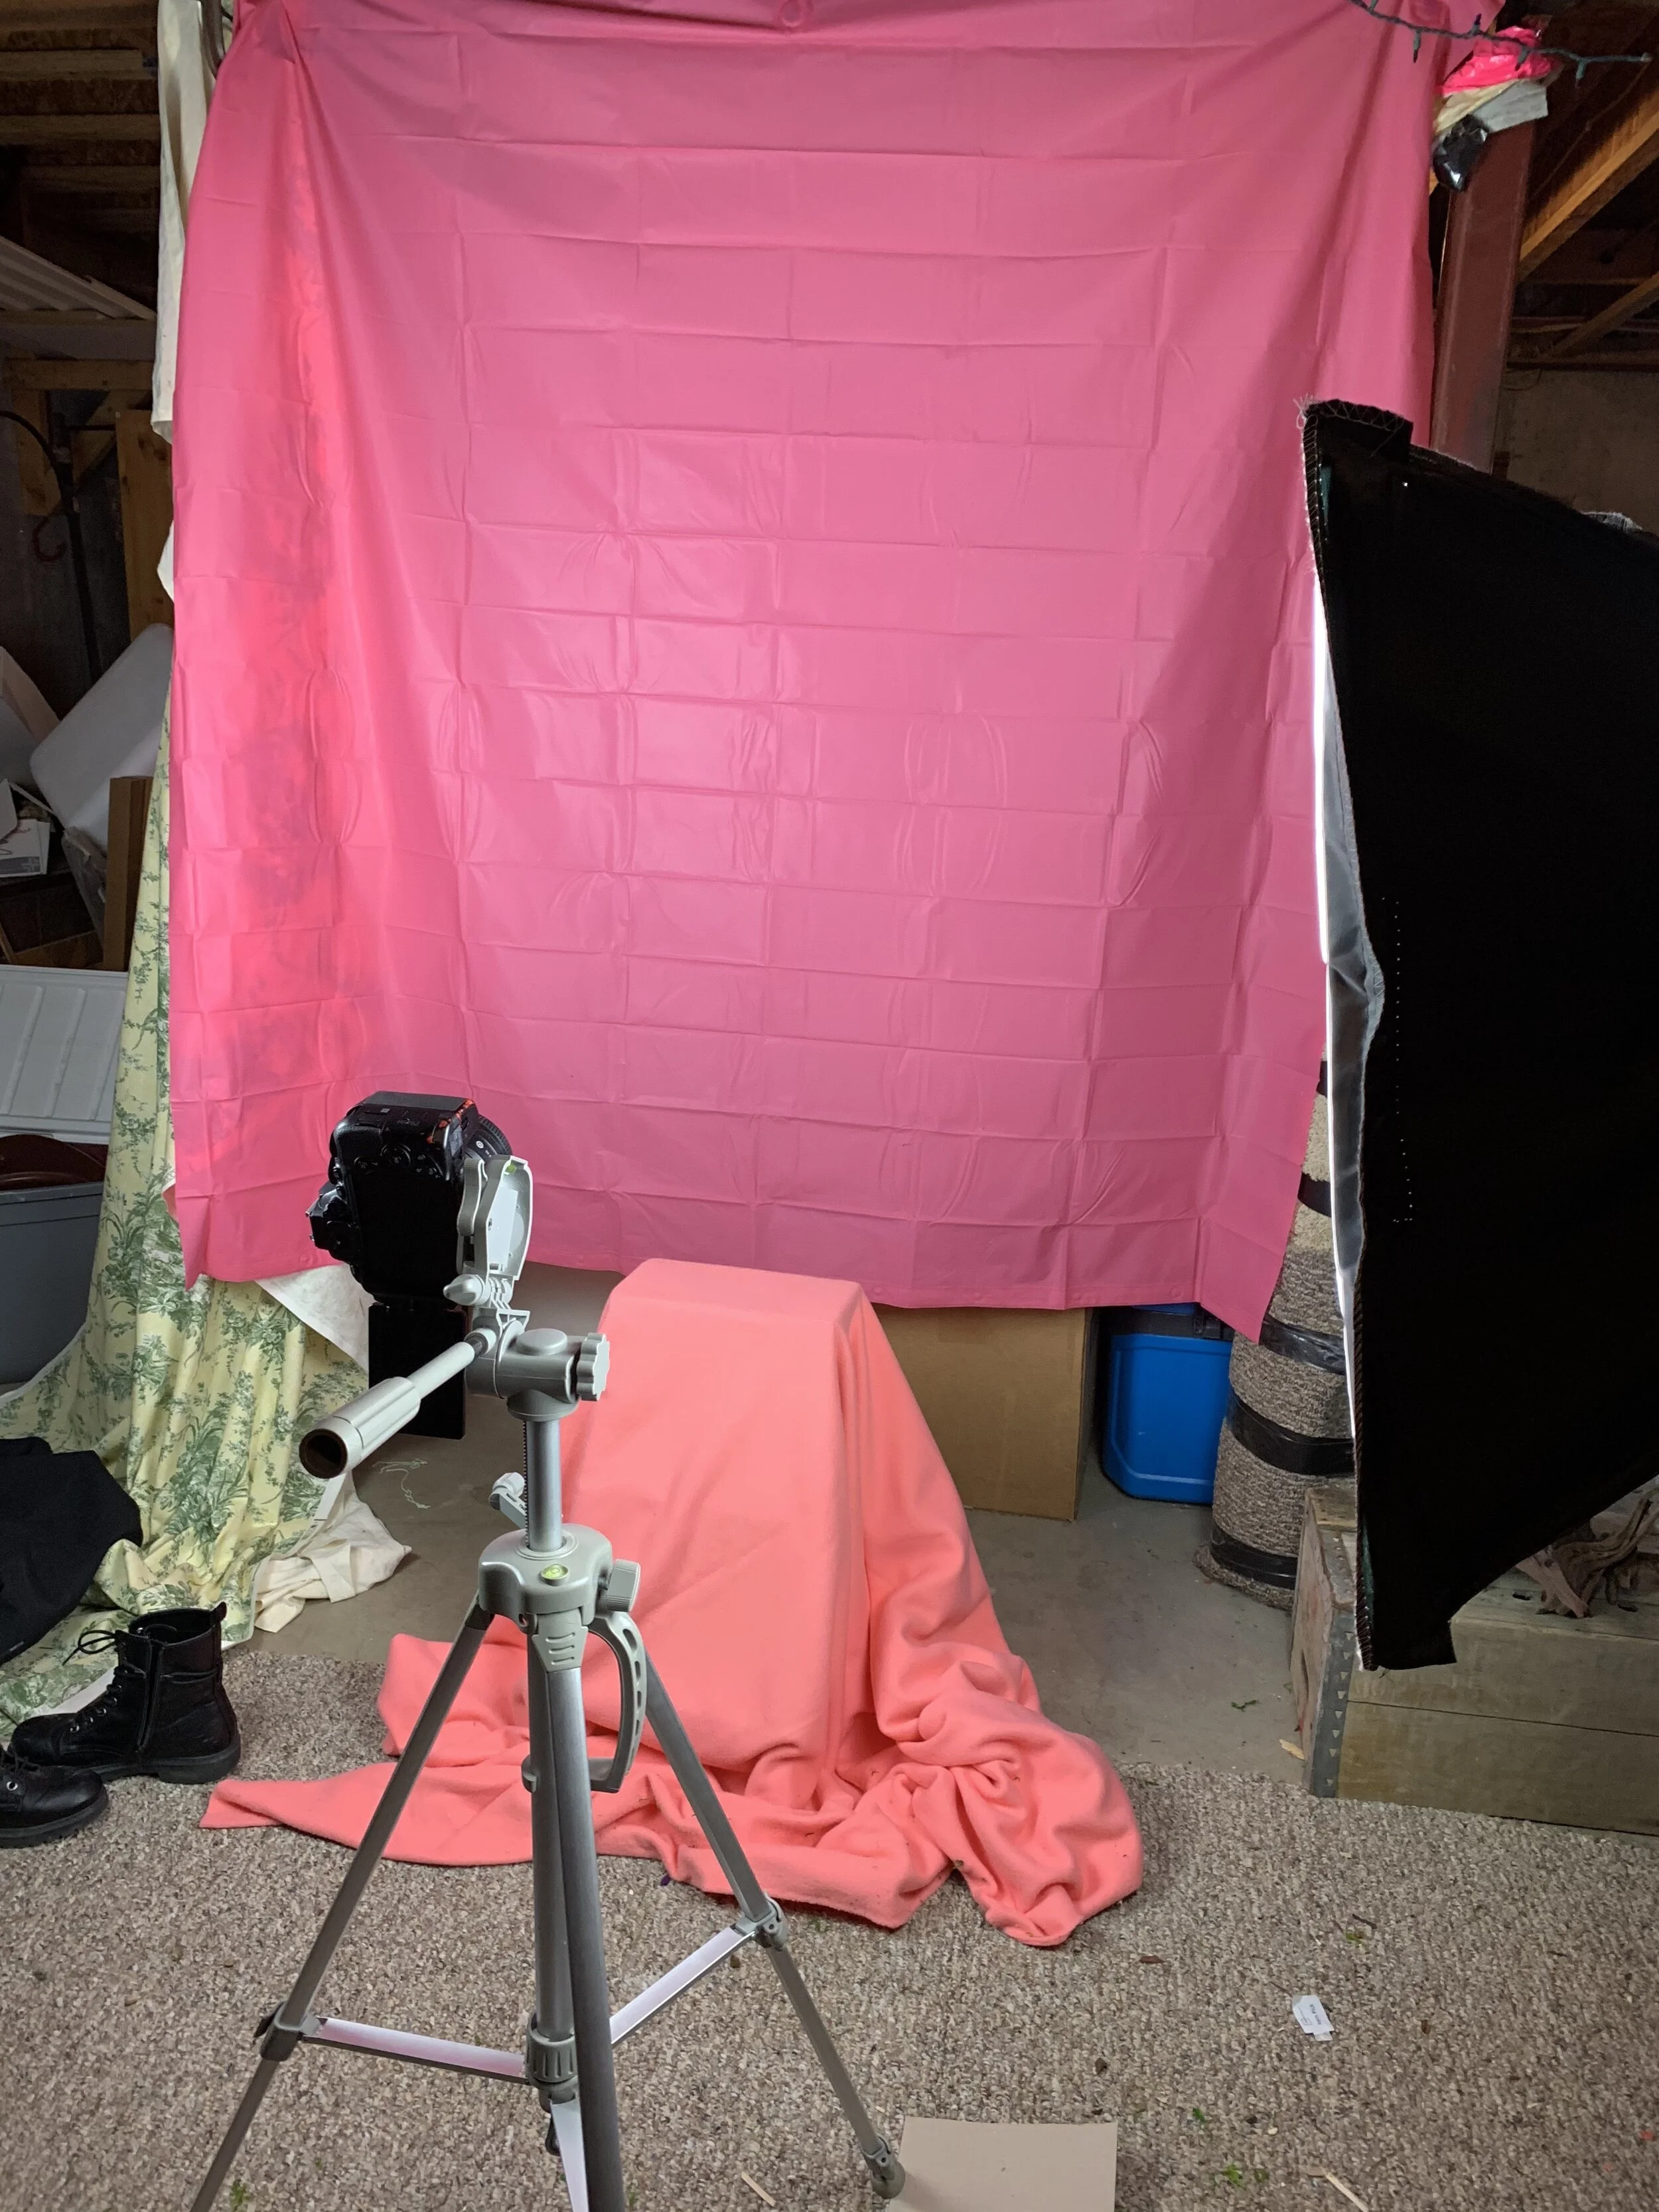
And here is the second set-up for the actual self-portrait. To the right of the picture is one of my softbox studio lights that I use. The brand is HPUSN from Amazon for a pretty low price compared to other studio lights. They have wonky stands, but they produce light for me, and that’s all that matters, right?
Attached to the tripod is my pride and joy, a Nikon D5600 camera. I’m not sure what brand the tripod is, but it does its job. The backdrop is the shower protector from the previous photo and I clipped it to the ceiling rafters with clothespins. I used a self-timer on my camera to photograph myself on the stool that’s covered with a cozy, pink blanket.